This pile needs to be cut up into 1 inch wide strips. If it was cotton you could rip it but jersey fabric doesn't really rip, so cutting it is.
That's the most boring part of it and I only do it a few bits at a time.
Once you have your long inch wide piece it needs to be cut into shorter pieces ready to pull through the matting.
This is where the tools come in. The two that come in the kit are the rag rugger and the gauge.
The wooden gauge is an invaluable bit of kit as it means all your short pieces can be cut to the right length easily. Just wrap the long piece around the gauge like this.
And then cut down the groove.
And you will be left with perfect lengths of fabric. Magic isn't it. I really couldn't manage without it.
Once you have a pile of short (about 3 inch) lengths then the rugging tool is needed.
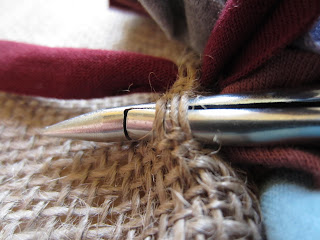
Push the pointy end under 2 or 3 vertical strands of the hessian it doesn't have to be precise.
Grab the end of the fabric by squeezing the handles together.
Then pull it back through the hessian and leave go of the fabric.
Next go back into the hessian about 2 or 3 horizontal strands above or below and do it all again. And that's it. Easy peasy.
You can see below I have pulled the lilac through underneath the burgundy. It doesn't matter where you start on your hessian but when you want to make the next row leave about 4 or 5 vertical strands between the rows as seen below.
It looks like quite a wide space but once a few rows have been done you can't see the gaps - honestly.
This is what the back looks like, I haven't been very accurate with the gap spaces but it doesn't show on the right side.
A handy hint is to turn in the edges about 2 inches (to the right side) before you start and secure them all the way round with a bit of fabric. That way the frayed ends will be hidden under the shagginess of the rug and unable to fray any more.
This is how mine looks so far, I usually manage a couple of rows at a time before my neck and shoulders start to ache.
I hope this has all made sense to you but if you have any questions then please ask.


It is looking really good.I may have to have a go at that myself.
ReplyDeleteOh that is looking fantastic so far, I can't wait to see the finished article. Thanks for the great tutorial, this is definately a craft I would love to have a go at.
ReplyDeleteM xxx
Just found you :D
ReplyDeleteThank you for this ... I've always fancied having a go at ragging a rug :D
This is fabulously helpful, thanks so much for posting it :) I have the 'pulling it through' tool but not a gauge. That looks like it would indeed be very useful. Must think about that. Anyway, good luck with your rug, you'll get there in the end and thanks for stopping by again and leaving me a lovely comment about my new desk :D
ReplyDeleteS x
The rug is looking great! Wonderful tutorial too. I love the little heart you made with the fabric too :) Elisabeth x
ReplyDeleteThis is lovely! I like the palate of colours you've chosen.
ReplyDeleteI was thinking about rag rugs recently as my mum has just finished one. I think it looks as pretty from the back as the front - hers is multicoloured and a bit more random and the back of the rug looks like a mosaic. She calls the rag rugger a "bodger" - no idea how it got that name!
Gillian x
Thank you so much for posting this. I have looked on line for what seems like for ever for a simple step by step tutorial - last time I tried to do it I only left one thread between each rag - you can imagine how gnarled up it got. This looks great x Jane
ReplyDeleteWhat a useful tutorial! in the age of YouTube videos, I have to say your non video step by step guide was not only refreshing, but crystal clear. I know rag rug making is not rocket science, but like any craft, having the right tools enhances the enjoyment even more. I am on a rag rug and patchwork course on Sat. - cannot wait and thanks to your guide, I am completely prepared.
ReplyDelete